KnowledgeBase | Forum | Contact Us | M1Files | Documents |
 |

Help Contents
|
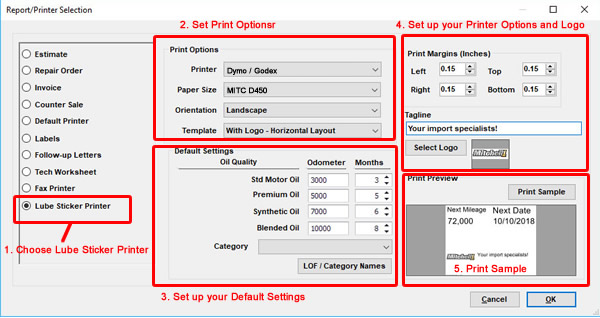
Lube Sticker Printer Configuring the Lube Sticker Printer Open the Report/Printer dialog box by selecting Configurations then Reports/Printers/Lube Sticker. You can also open this screen by clicking File and choosing Print Setup. The Report/Printer Selection dialog box displays.
1. Click the Lube Sticker Printer option. 2. Set your Print Options to match the Printer and Paper Size you desire. Note: You must first setup your sticker printer and make it visible on your network for it to appear on the Printer list. 3. Set your Default Settings. These are the settings that will display when launching the Print LOF option from the Order tab. Note: The LOF/Category Names are the same ones used in your LOF packages. 4. Setup your Print Margins, Tagline, and Logo
5. Print Preview/Print Sample
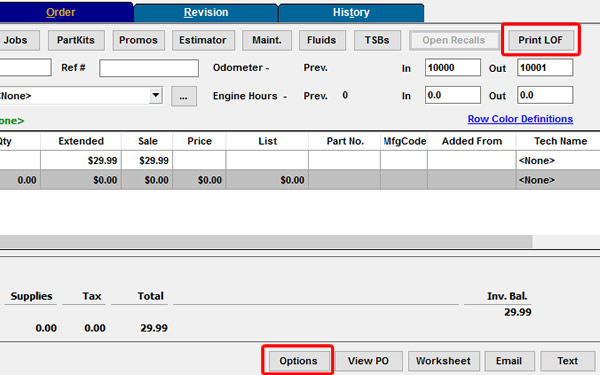
Printing the Lube Sticker To Print the Lube Sticker 1. Select Print LOF from within the Order Panel. Alternatively, you can print the sticker from within the Order Options screen by selecting Print LOF Sticker.
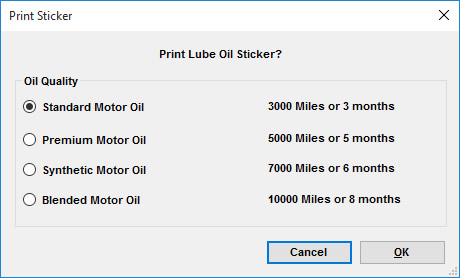
The Print Sticker dialog box displays.
2. Choose the quality of oil and click OK. Once you have printed the sticker, you will be prompted for a future appointment in the Scheduler.
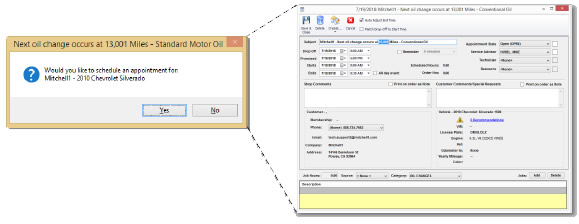
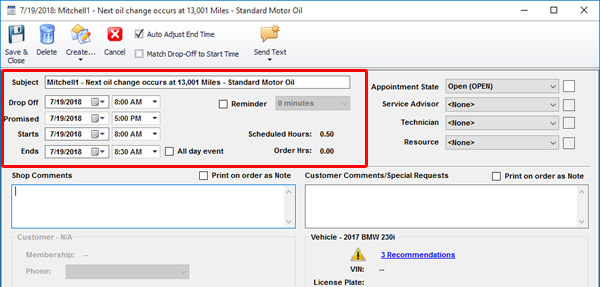
3. Click Yes to schedule the appointment. This creates a vehicle recommendation. A future appointment is generated based on the date and milage of the selected Oil Quality. Click Save & Close to save the appointment.
4. Click Save & Close to save the appointment.
|
Copyright 2025 Mitchell Repair Information Company, LLC and Snap-on Inc. All Rights Reserved. Order: Mitchell 1 Software Products | Order Manager SE | Order ProDemand | Order ShopKey Pro |